
Every published event on your chapter website includes a built-in Add to Calendar option. Members can save an event to Outlook, Apple Calendar (iCal), or Google Calendar with one click. There is nothing to turn on or configure; it appears automatically.
See it in action:
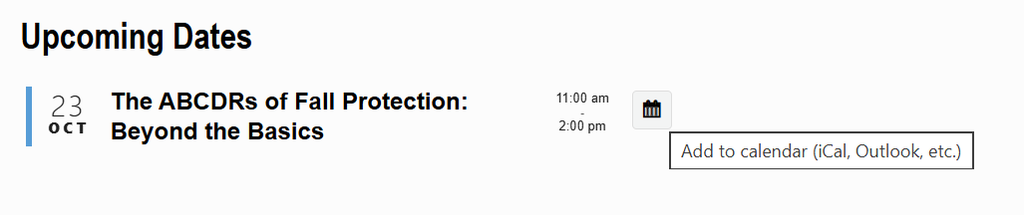
How It Works
On your chapter’s events page and on each individual event page, every date listed under Upcoming Dates has a calendar icon. Clicking it downloads a calendar file (.ics) with the event’s:
- Title
- Date and start/end time
- Venue/location
- Description
Because the file is generated from your event in Event Espresso, what members see in their calendar is only as accurate as your event listing.
Before You Publish an Event
To make sure members get a clean calendar entry:
- Use a clear event name. It becomes the calendar entry title (e.g., October Technical Meeting – Fall Protection, not Meeting).
- Confirm the date and start/end times.
- Add the venue. For virtual events, include the meeting link in the event description.
- Keep the description concise. The first part of it shows in the calendar entry.
Note: If you edit an event after members have added it to their calendars, their copies won’t update automatically. For important changes (date, time, or location), send an update to registrants and ask them to download the calendar file again.
Instructions to Share With Members
Link to this section or paste it into an event announcement, email, or blog post.
Outlook (Windows desktop)
- Click the calendar icon next to the event date.
- Open the downloaded
.icsfile. - Click Save & Close.
Outlook on the Web / New Outlook
- Click the calendar icon and save the file.
- In Outlook, go to Calendar > Add calendar > Upload from file.
- Select the file, choose a calendar, and click Import.
Apple Calendar (Mac)
- Click the calendar icon next to the event date.
- Open the downloaded file, choose a calendar, and click OK.
iPhone or iPad
- Tap the calendar icon next to the event date.
- Tap Add to Calendar (or Add All), then Done.
Google Calendar
- Click the calendar icon and save the file.
- In Google Calendar, click the gear icon > Settings > Import & export.
- Select the file, choose a calendar, and click Import.
Troubleshooting
- No calendar icon appears: Make sure the event is published and the date is upcoming. Draft and past events don’t show the icon.
- Wrong time in a member’s calendar: Check the event’s times in Event Espresso. Calendar apps convert to the member’s local time zone automatically, so a member in another time zone will see a different time than your listing.
- File downloads but doesn’t open: The member can find the
.icsfile in their Downloads folder and open it, or right-click and choose Open with > their calendar app.
Need help? Submit a support ticket and our team will assist you.